Install Visual C++ in Visual Studio
How to install Visual C++ in Visual Studio Community 2017? I have the Visual Studio Installer installed.
✍: FYIcenter.com
![]() If you have the Visual Studio Installer ready,
you can follow these steps to install Visual C++ in Visual Studio Community 2017.
If you have the Visual Studio Installer ready,
you can follow these steps to install Visual C++ in Visual Studio Community 2017.
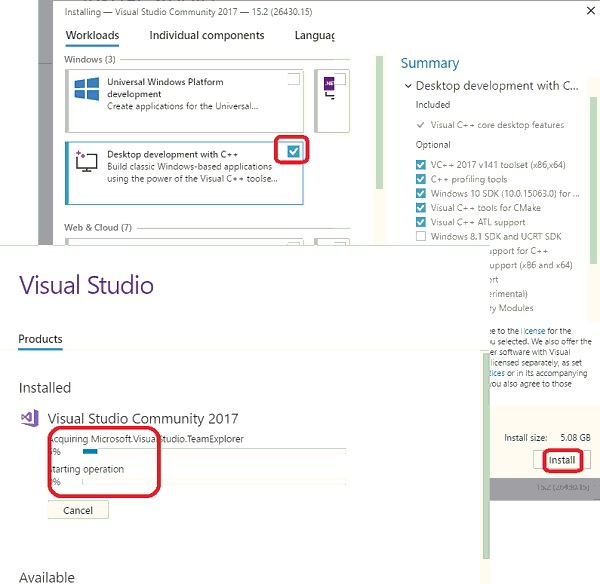
1. Run "All Programs > Visual Studio Installer". You see the Visual Studio Installer window.
2. Click the checkbox on the "Desktop development with C++ - Build classic Windows-based applications..." section to select it.
3. Click "Install" at the lower right corner to start the download process. You see the download progress indicator window.
4. Wait for the download the finish. It could be a long wait, since it about 5GB data to transfer.
5. Restart your computer, when the download is completed.
After restart, Visual Studio Community 2017 is ready for your to build C++ applications.
The picture below shows you how to download and Visual C++ for Visual Studio:
⇒ Setup Visual Studio 2017 for Visual C++
⇐ Using Visual C++ in Visual Studio
2023-12-10, ∼2852🔥, 0💬
Related Topics: