Application Release Build with Visual Studio 2017
How to make application release build with Visual Studio 2017?
✍: FYIcenter.com
![]() If you want to make a final release build with your application in Visual Studio 2017,
you can follow this tutorial:
If you want to make a final release build with your application in Visual Studio 2017,
you can follow this tutorial:
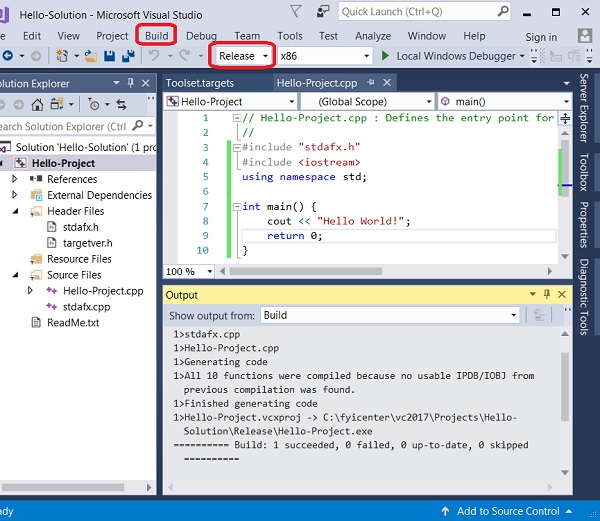
1. Click "Build > Clean Solution" menu. You see debugging files removed.
2. Change the build configuration from Debug to Release in the menu area.
3. Click "Build > Build Solution" menu. You see project build messages showing up in the output box below the source code.
1>------ Build started: Project: Hello-Project, Configuration: Release Win32 ------
1>stdafx.cpp
1>Hello-Project.cpp
1>Generating code
1>All 10 functions were compiled because no usable IPDB/IOBJ from previous compilation was found.
1>Finished generating code
1>Hello-Project.vcxproj ->
   C:\fyicenter\vc2017\Projects\Hello-Solution\Release\Hello-Project.exe
========== Build: 1 succeeded, 0 failed, 0 up-to-date, 0 skipped ==========
4. Go to a command console and run:
>C:\fyicenter\vc2017\Projects\Hello-Solution\Release\Hello-Project.exe
Hello World!
The picture below shows you how to make release build for your application in Visual Studio:
⇒ Using Visual Studio Command Prompt
⇐ Build Console Application with Visual Studio 2017
2023-10-27, ∼4632🔥, 0💬
Related Topics: